
Last updated November 18, 2026








Free written scope consultation - allowances, timeline, and change-order rules on paper before a single trade is scheduled
Kitchen Remodeling Maintenance Schedule: What to Do and When
Cabinet hinges are the most replaced hardware item in a remodeled kitchen, and they almost never fail from wear. They fail because of one adjustment nobody schedules: the 90-day re-tightening that every cabinet manufacturer recommends and almost no contractor hands off to the homeowner. A new kitchen is not a finished object. It’s a set of systems settling into a house, and the first year runs on a different calendar than the one you’ll follow for the next twenty. This guide lays out that calendar month by month, including the Mesquite-specific water and dust conditions that change the intervals. Read it once, put the dates in your phone, and you’ll get a decade more out of the room.
Quick Answer
A remodeled kitchen needs specific maintenance at four points in its first year: a cabinet hardware re-tightening at 90 days, grout and caulk inspection at 6 months, a quarterly descale of faucet aerators and dishwasher spray arms if you’re on Mesquite municipal water, and a full room-by-room walkthrough at month 10, before your workmanship warranty expires. After year one, the schedule settles into a simple twice-yearly check.
Styles & brands we work with
- Kitchen remodeling
- Bathroom remodeling
- Home additions & ADU
- Roofing
- Windows & doors
- Driveway & pavers
- Fence
Table of Contents
- The 90-Day Cabinet Adjustment
- Grout and Caulk: Three Locations, Three Timelines
- The Two Spots Under the Sink That Cause the Most Water Damage
- Mesquite’s Hard Water and the Quarterly Flush
- The 10-Month Walkthrough Checklist
- Seasonal Shifts: What a Desert Climate Does to a New Kitchen
The 90-Day Cabinet Adjustment
Ninety days after your cabinets go in, the wood has finished its first seasonal expansion. Cabinet doors, drawer fronts, and the boxes themselves have absorbed and released moisture, and every hinge screw and drawer slide has backed out a fraction of a turn. This is normal. It’s also the moment where a five-minute adjustment prevents the sag, rub, and clatter that convinced thousands of homeowners their cabinets were defective.
To do the adjustment yourself, you don’t need a service call. You need a screwdriver and fifteen minutes.
- Open every door and check the hinge plates. Tighten each screw by hand until you feel resistance, not until it stops dead. Overtightening strips the pilot hole in the cabinet frame, which is a repair, not an adjustment.
- Check door alignment against the frame and the door beside it. Adjust the hinge’s cam screws in small turns until the gaps are even. Most European-style hinges adjust in three directions.
- Pull each drawer fully open and check the slides for wobble. Tighten the mounting screws at both ends of the slide, front and back.
- Lubricate hinges with a dry silicone spray, not oil. Oil attracts the fine desert dust that moves through Mesquite in spring, and dust turns oil into grit.
KraftMaid and Wellborn cabinets, both of which we install, ship with adjustment guidance specific to their hinge systems. Keep that paperwork. If a hinge part actually fails inside your first year, the manufacturer’s warranty typically covers the part – our 365-Day Done Right Promise covers the installation. We make it right at no charge if our work is the reason something didn’t hold. That distinction matters, and it’s exactly the kind of thing that should be in writing before work starts, which is the whole idea behind Bradford Remodeling Mesquite home.
Grout and Caulk: Three Locations, Three Timelines
Homeowners treat grout and caulk as one job. They’re not, and they fail on completely different timelines. Here’s how the three main locations in a remodeled kitchen behave:
- Backsplash grout. Cementitious grout on a backsplash is the most stable of the three. It sits over a rigid substrate and doesn’t move much. Inspect at 6 months, then yearly. Look for hairline cracks at inside corners and around outlets. If you used epoxy grout, inspect yearly and expect very little movement.
- Counter-to-wall caulk. This is the seam at the back of the counter where it meets the backsplash or the painted wall. It moves every time the counter expands with heat from a hot pan or a dishwasher cycle underneath. Inspect at 6 months and 12 months, then yearly. Any gap wider than a hair’s width is a moisture entry point.
- Sink caulk. The seal where the sink meets the counter is the first to go. It’s wet constantly, it gets scrubbed with abrasive cleaners, and it takes hot water straight from the tap. Inspect every 6 months. With Mesquite’s hard water, expect to replace this caulk every 12 to 18 months as a normal lifecycle, not as a defect.
When you re-caulk, use 100% silicone at the sink and counter-to-wall seams. It flexes and it holds up to water. Use a paintable silicone blend only where the caulk meets painted drywall and you plan to paint over it. Cut out the old bead completely before you lay the new one. Caulk over caulk peels within months. And if your backsplash or floor tile was set over a waterproofing membrane such as Schluter’s system, remember that the membrane is your real defense – the grout and caulk are the wear layer on top of it.
If you’re planning a kitchen project and want to know what these maintenance intervals look like on the front end, the team behind Kitchen Remodeling in Mesquite walks through specifications before a single drawer is hung.
The Two Spots Under the Sink That Cause the Most Water Damage
In the first year after a remodel, most water damage we see in Mesquite kitchens starts in one of two places under the sink. Both are connection points that get installed clean and then quietly work loose as the supply lines and drain fittings expand and contract through a winter and a summer.
Here’s what to check and when:
- The garbage disposal’s mounting ring and drain connection. Check at 3 months, then every 6 months. Run water, then look under the disposal with a flashlight for any weeping at the flange or the discharge pipe. The mounting ring often needs a quarter-turn snug-up after the first season. Tighten by hand only – a wrench is how the flange cracks.
- The dishwasher supply and drain connections. Check at 3 months, then every 6 months. The dishwasher supply line connects to the hot water under the sink, and the drain hose loops up into the cabinet. That loop should sit high enough to prevent backflow – if it’s sagging, water sits in the hose. Look at both fittings after every few cycles for the first month.
Put a small water alarm on the cabinet floor under the sink. An alarm costs less than a plumber’s after-hours call and a fraction of what a cabinet base replacement costs. In our experience, a homeowner in Mesquite who sets one under the sink catches more leaks in the first year than any other single device.
Mesquite’s Hard Water and the Quarterly Flush
Mesquite municipal water runs hard, and hard water doesn’t just leave spots on your new glassware. It builds mineral scale inside the small-diameter parts of a kitchen – the parts you can’t see until performance drops. A new Delta or Moen faucet, an American Standard or Toto kitchen fixture, or a dishwasher spray arm all choke slowly on the same calcium deposit. The fix is boring and it works: a quarterly flush.
Here’s the routine to run every 90 days:
- Unscrew and soak your faucet aerators. Drop each one in a cup of white vinegar for an hour, rinse, and screw it back on. You’ll be surprised how much scale a single aerator holds after a quarter of Mesquite water.
- Flush the dishwasher spray arms. Pull the bottom spray arm free if it comes off, check the pinholes, and clear any blocked holes with a toothpick. Run a cycle with a citric acid dishwasher cleaner. This is the step most homeowners skip, and it’s the one that keeps the spray arm from leaving a cloudy film on every glass.
- Check the under-sink supply lines. Look for white crusting at the shutoff valves and the connection to the faucet. Crusting means a slow leak that’s drying in place. Wipe and watch; if it comes back, it needs a proper fix.
- Run hot water through the disposal and rinse it with a handful of ice and a half-cup of baking soda. Keeps the blades from gumming up and keeps the drain from holding odor in a closed cabinet.
If you don’t run a water softener, consider one. Plenty of Mesquite homeowners get through this checklist twice, find their aerators caked each time, and decide a softener is the cheaper long-term answer.
The 10-Month Walkthrough Checklist
Most workmanship warranties run 12 months from project completion. That’s why the most important maintenance date on your calendar is month 10, not month 12. You need the six weeks before the warranty expires to identify any issue, call it in, and get it corrected under coverage. A 10-month walkthrough gives you that working window.
The reason isn’t paranoia. It’s that most of the issues that show up in the first year happen after the first seasonal swing, and that’s usually the first winter-to-summer cycle. By month 10, a desert kitchen has been through a full round of expansion and contraction. If something is going to fail, it usually has by then.
Walk the room with a notebook and a flashlight, room by room:
- Cabinets: Every door hinge tight, every drawer slide smooth, no rubbing at the edges, no sagging shelves.
- Counters: Backsplash grout intact at inside corners, no hairline crack at the counter-to-wall seam, the sink seal sound.
- Flooring: Any tile that sounds hollow when tapped (a sign of a thin thinset bed), any grout line you can catch a fingernail in, any transition strip that has lifted.
- Faucet and sink: No drip at the base, no crusting at the supply lines, sprayer works at full pressure.
- Appliances: Disposal doesn’t rattle or leak; dishwasher drains fully; range hood vents properly; all connections checked with a flashlight.
- Outlets and switches: No cracks at the switch plate, no warmth at any outlet cover, GFCI test trips and resets properly.
- Paint and drywall: Any crack wider than a hair at a ceiling-to-wall joint or above a doorway, any bubbling at a seam near plumbing.
Anything on that list that traces to how the work was installed is warranty territory. Our 365-Day Done Right Promise is exactly that commitment in writing – if the work fails inside the guarantee window, we come back and correct it at no charge. The walkthrough is how you use it, not how you avoid it. The same calendar discipline is what a General Contractor in Mesquite should walk you through at job close.
Seasonal Shifts: What a Desert Climate Does to a New Kitchen
A new kitchen in Mesquite lives through a harder seasonal cycle than the same room in a wetter climate. Summer temperatures push above 110°F, and winter nights drop to the 30s – the swing from August to January can be 80 degrees across the year. Wood cabinets expand and contract with that. Caulk beads flex. Shutoff valves get one more thermal cycle per year than the same valve in a coastal house.
The practice that matters most: schedule your deeper inspections for early spring, just after the last cold nights, and early fall, when the summer heat has passed its peak. That’s when a cabinet door has finished one round of shrinkage and one round of swelling, and when caulk at the counter has finished a summer of hot-pan heat cycling. Mesquite homeowners who do their two checks at those two times catch almost everything before it becomes a repair.
The other desert variable is dust. Spring wind in the Mesquite area drives fine particulate through every gap and gap-seal. Wipe down drawer slide tracks, cabinet shelf edges, and the dishwasher door seal every month during the spring wind season. A dry silicone spray comes after the wipe, not before. This is a small habit that keeps drawer slides smooth for a decade.
Common Mistakes to Avoid
- Never re-tightening cabinet screws. Every cabinet manufacturer recommends a post-installation adjustment, and skipping it is the leading cause of “defective” cabinets in the first year. If a hinge feels loose at six months, the screw backed out rather than the part failing.
- Caulking over old caulk. A new bead laid over a peeling one fails within the year. Cut the old bead out completely every time; the second bead lasts years, the shortcut bead lasts months.
- Using an abrasive scrubber on sink caulk. It’s the fastest way to shorten the 12-to-18-month lifecycle of sink caulk to six. Keep a dedicated soft sponge for the sink seam.
- Assuming a touchless faucet needs less scale maintenance. The sensor is fine; the aerator and the water path are the same whether the faucet has a handle or not. Flush it every quarter.
- Skipping the aerator and spray arm flush because the fixtures are new. New fixtures scale faster in their first year than in their second, because the internal surfaces are fresh and the mineral deposits bond more readily.
- Not planning for the 10-month walkthrough. Homeowners who wait until month 12 usually find the two issues they would have caught anyway – and no time to file. Put it on the calendar the day the project closes.
- Ignoring the under-sink cabinet’s own base. A slow leak that soaks the cabinet floor before you see a puddle will void the manufacturer’s warranty on the cabinetry if the substrate rots from below.
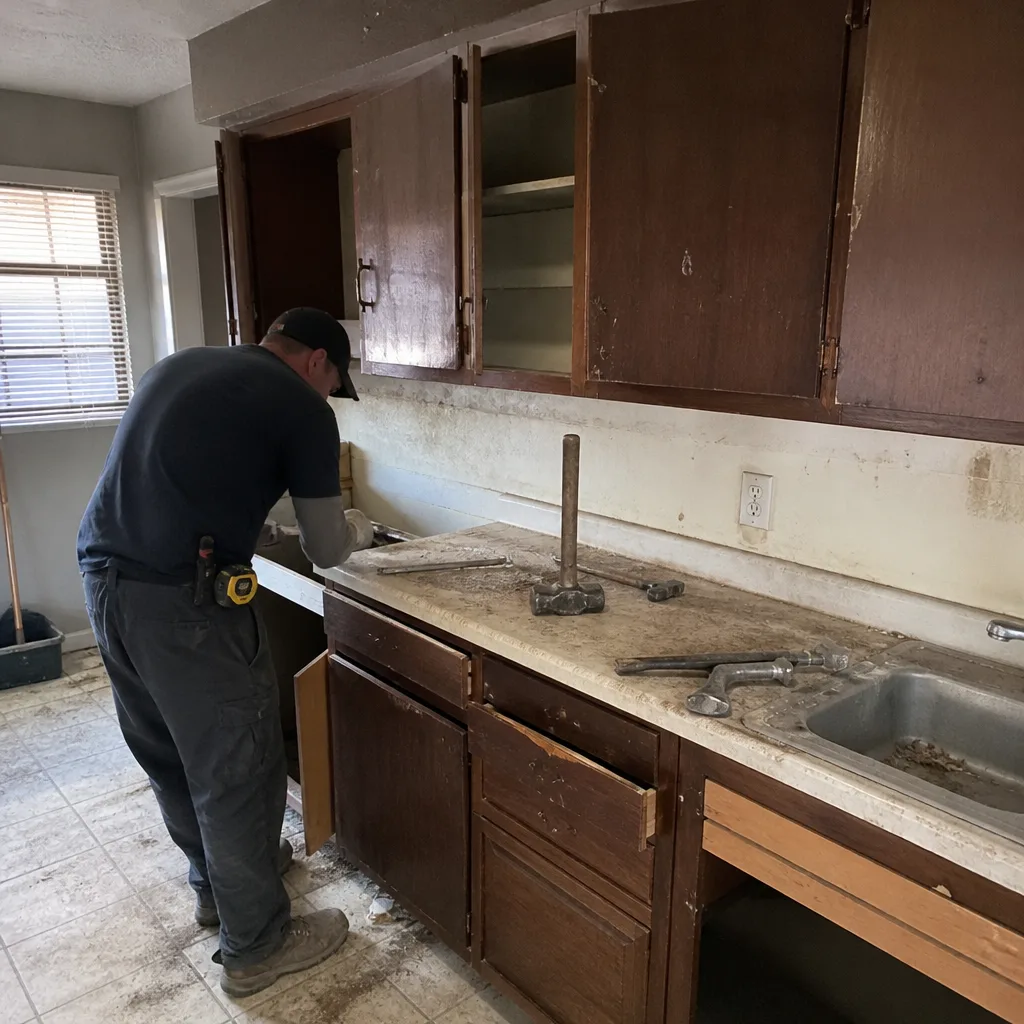
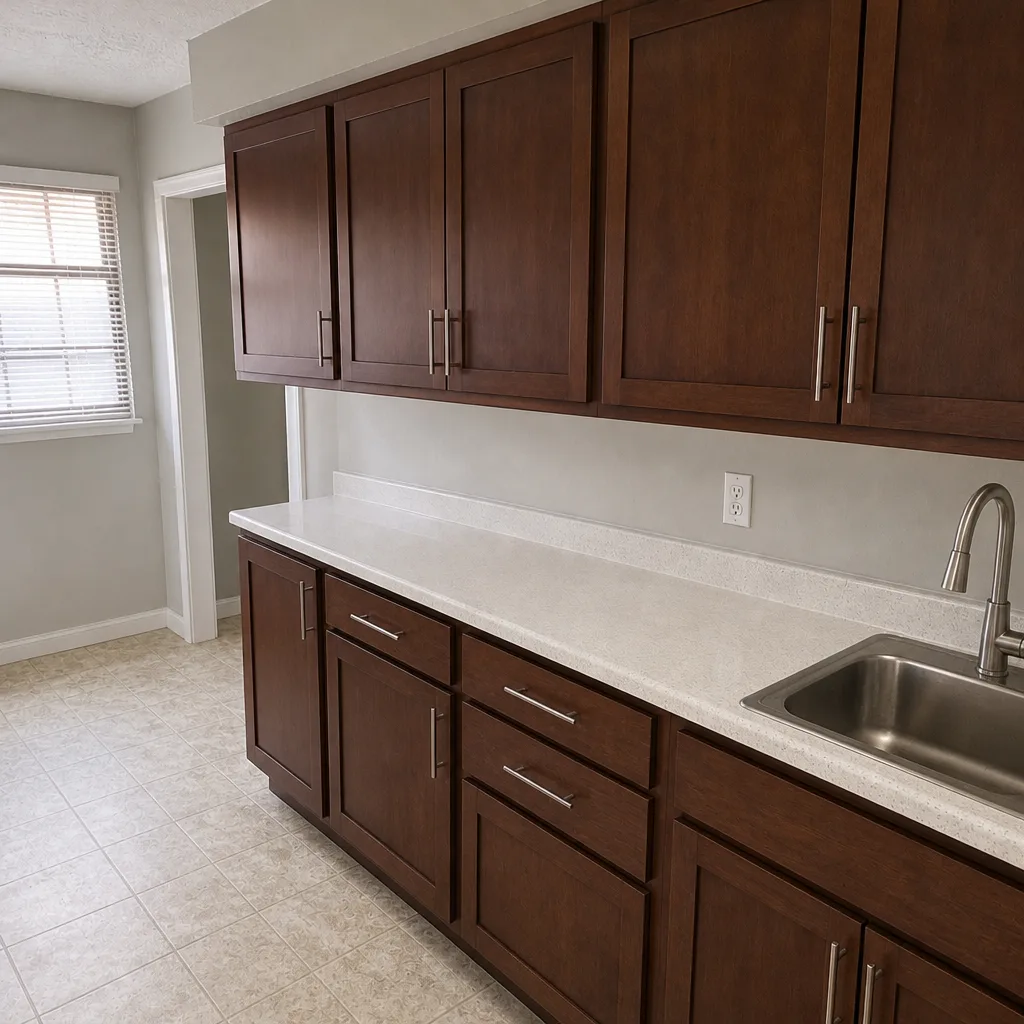
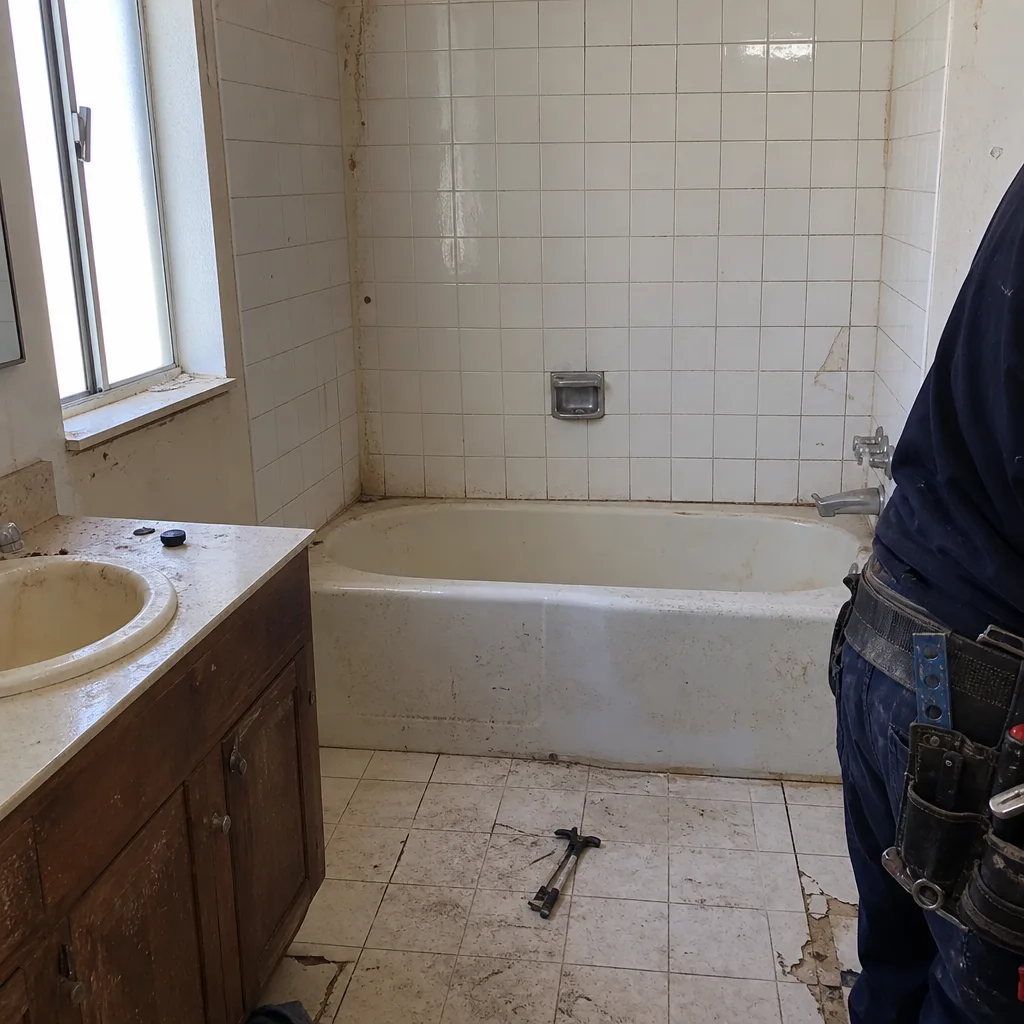
See the difference
 Before
 After
 Before
 After
 Before
 After
When to Call a Professional
Most of this schedule is genuinely homeowner territory: re-tightening hinges, re-caulking the sink, soaking an aerator. Call a professional when the work crosses into a system you don’t want to touch. A shutoff valve that won’t close or drips when you test it, a supply line that crusts white within a month of wiping it down, a dishwasher that backs up into the cabinet floor, a garbage disposal that trips the breaker or won’t seat in its ring after a remount attempt – those are the calls that save money. Same for any caulk joint you’ve already replaced once and found failing again, because that usually points to a substrate problem underneath rather than a bead problem. Bradford Remodeling Mesquite offers free estimates in Mesquite for both remodels and post-project warranty corrections; call (844) 761-8665, and a live person will answer any hour of the day.
Frequently Asked Questions

Once at 90 days, then once a year after that. The 90-day adjustment is the only one most homeowners miss, and it’s the one that matters most – it’s when the wood has finished its first seasonal expansion and every hinge screw and drawer slide has backed out a fraction of a turn. After year one, an annual check is enough. Call (844) 761-8665 if you want a written maintenance walkthrough at job close.
About 12 to 18 months at the sink, 18 to 24 months at the counter-to-wall seam, and 3 to 5 years on backsplash grout if it was properly installed over a rigid substrate. Mesquite’s hard water shortens the sink interval, which is why our recommendation is an inspection every 6 months at that seam. Call us for the install specs on your specific counter.
Yes, but slowly and in specific places. The aerators, the dishwasher spray arms, and the under-sink supply lines are the three spots where calcium scale builds fast. You won’t see damage in week one; you’ll see reduced pressure and cloudy glassware by month nine if you skip the quarterly vinegar soak. A quarterly flush is the answer, and it’s fifteen minutes of work.
The 10-month room-by-room walkthrough. It gives you six weeks before the 12-month mark to file any issue and get it corrected under coverage. Every item on our checklist is something you can verify yourself with a notebook and flashlight. If you find something that traces to installation, call it in right then – don’t wait for month 12 to get you to it.
You don’t need one, but it’s the most cost-effective upgrade for anyone who’s tired of a quarterly aerator scrub. Mesquite’s municipal water runs hard enough that most homes without a softener caked their aerators by the second flush. Talk to us about a softener rough-in during a remodel – it’s easier to plan in that out.
Yes, once at 90 days if you’d rather not do the cabinet adjustment yourself, and once at 10 months to walk the room before your workmanship warranty window closes. Both are exactly the kind of walkthrough a contractor should offer after any kitchen project. We recommend scheduling them at project close, not waiting until something fails. Call (844) 761-8665 for the free estimate before a remodel, or for a post-project warranty review.
The Bottom Line
A new kitchen runs on a different maintenance calendar in its first year than it will afterward – a 90-day adjustment for the cabinets, a 6-month caulk and grout inspection, a quarterly flush of the parts affected by Mesquite’s hard water, and a 10-month walkthrough before the warranty expires. Get those four checkpoints on the calendar at project close and the room settles in without a single avoidable call. Get them wrong and the same kitchen looks a decade older than it is by year three. If you’d like a written maintenance plan built into your next project, we’re glad to walk through it before any work starts. Our technicians have up to 22 years of experience, every project carries a written price before work begins, and our 365-Day Done Right Promise is in writing at job close. If you’re planning the whole home, the same maintenance discipline is central to Bathroom Remodeling in Mesquite as well – and Bradford Remodeling Mesquite is happy to walk you through that calendar too.
Call (844) 761-8665 to schedule a free estimate, or to set up a post-project maintenance walkthrough. A live person answers any hour of the day.
Written by the team at Bradford Remodeling Mesquite.